We've rebranded! Texas Premier Oasis is now Legendary Outdoor Solutions - same team, same standards, elevated identity.

How to Build a Pool: Steps, Timeline, and Tradeoffs
Building a pool starts with pool type, permit-ready plans, excavation, structural work, and startup. Here is what homeowners should expect at each step.
4/14/20266 min read
To build a pool, you start with the right pool type, a permit-ready site plan, and a layout that works for your yard, then move through excavation, structural work, plumbing and electrical, decking, interior finish, and startup. For most homeowners, the hard part is not the digging. It is making the early decisions that affect cost, timeline, maintenance, and how the backyard actually works once the pool is done.
Step 1: Decide what the pool needs to do
A pool for lap swimming is usually shaped and sized differently than a pool built for kids, weekend entertaining, or a tanning ledge and spa. That sounds obvious, but it drives almost every later decision.
A few examples:
A simple rectangle usually makes cleaning easier and leaves more usable deck space.
A tanning ledge, beach entry, or attached spa adds comfort and resale appeal, but also adds plumbing, finish area, and budget.
A larger shallow play area may be better for young families, while deeper water and jump features change both structure and safety planning.
This is also the point where homeowners should decide whether the pool is the whole project or one piece of a larger backyard plan. In North Texas, a pool that looks good on paper can leave no practical room for shade, dining, or drainage improvements if the whole yard is not planned together.
Step 2: Pick the pool type before you obsess over finishes
The Pool & Hot Tub Alliance points homeowners toward the same core decision early on: choose the right type of pool for your budget, yard, and maintenance expectations.
The biggest tradeoffs usually look like this:
Concrete or gunite works best when you want a custom shape, raised walls, an attached spa, or a design that has to adapt to a specific backyard. The upside is flexibility. The tradeoff is more field construction and usually a longer build.
Fiberglass works well when you want a durable, lower-maintenance shell and the site has enough access to bring it in. The tradeoff is that size and shape options are more limited because the shell arrives pre-formed.
Vinyl liner can be a more affordable route in some markets, but homeowners still need to weigh long-term upkeep, finish preferences, and local contractor availability.
If you already know you want tight curves, a custom spa spillway, a wide tanning shelf, and a pool shaped around a patio cover or outdoor kitchen, you are usually describing a concrete pool project.
Step 3: Get the layout, drainage, and permit path right
This is the part homeowners skip past mentally, but it is where expensive mistakes usually begin.
Before excavation, the plan should show where the pool sits on the lot, how close it is to property lines, where the equipment pad goes, how decking ties in, and how water will move away from both the pool and the house. Forney routes residential permit submissions and project documents through MyGov, and the city notes that contractors working in the city must be registered. That is a good reminder that a pool is a real permitted construction project, not just a backyard add-on.
A good pre-dig checklist usually includes:
setbacks and easements
fence and gate planning
equipment-pad location and service access
deck size around the pool, not just the pool shell itself
drainage direction during heavy rain
access for excavators, material delivery, or a fiberglass shell if one is being craned in
In Forney and across North Texas, drainage deserves real attention. Flat lots, clay-heavy soils, and hard downpours can turn a pretty pool project into a muddy maintenance problem if runoff is not handled early.
Step 4: Expect excavation to feel dramatic, but not close to finished
Excavation is usually the first stage that looks fast from the homeowner's perspective. River Pools notes that excavation can take several hours to two days depending on pool size, soil conditions, equipment, and dirt-removal logistics.
That is a useful reality check because the dig is only the start of the field work.
Access can change this stage a lot. A wide side yard is very different from a tight gate, overhead power lines, or a backyard where crews have to use smaller equipment. Dirt haul-off is another overlooked cost driver. If there is no easy place for spoil to go, the job gets slower and more expensive.
Step 5: Build the structure that the pretty finish depends on
For a concrete pool, this is where the project starts turning from a hole into a structure.
River Pools breaks the concrete build into several practical stages:
steel placement commonly takes 1 to 2 days
plumbing commonly takes 1 to 2 days
shell placement commonly takes 1 to 2 days
the concrete shell then needs a 28-day cure before later finish steps
Those are not universal promises for every backyard, but they are useful because they show why a pool build often moves in bursts. One week may look busy, then the project may appear quiet while curing, inspections, or the next trade is pending.
This stage matters more than the decorative selections homeowners usually focus on first. Good structure and equipment planning affects:
circulation and skimmer performance
pump and filter sizing
future service access
where lights, bubblers, or water features can go
how easy the pool will be to own once the excitement wears off
A builder who gets the hydraulics and equipment layout right is often more valuable than the builder with the flashiest finish samples.
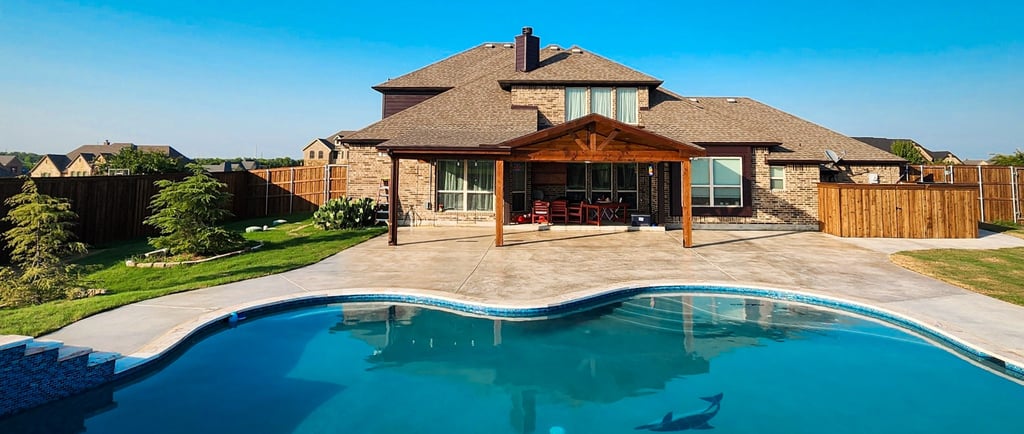
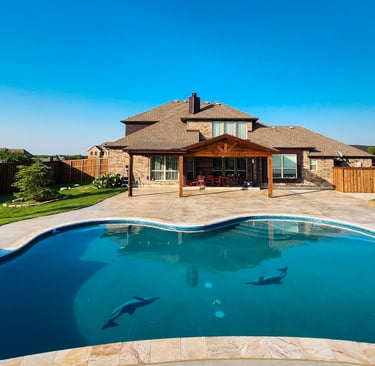
Step 6: Finish the space around the water
A pool that has beautiful water but awkward decking still feels wrong in daily use.
After the shell stage, later work usually includes coping, tile, decking, drainage details, barriers, and any surrounding hardscape. River Pools notes that tile and coping on concrete pools can take from about 3 days to 2 weeks, and patio installation often adds another 1 to 2 weeks depending on scope.
That is where homeowner tradeoffs become obvious:
More deck space gives you room for loungers, traffic flow, and safer movement, but raises the budget.
Shade structures make the pool more usable in Texas heat, but they need to be coordinated with the overall layout.
Premium coping, tile, and raised features improve the look, but they also add labor and material decisions.
For many North Texas backyards, the surrounding deck, drains, and shade plan do as much for livability as the pool itself.
Step 7: Treat startup like part of construction, not an afterthought
A pool is not finished the moment it is full of water.
Startup includes filling, equipment checks, chemistry balancing, and learning how the system should be run and maintained. PHTA's consumer guidance is helpful here because it treats maintenance as part of the ownership decision from the beginning, not something to worry about after the pool is built.
Homeowners should expect regular work after handoff, including:
water testing and chemistry balancing
brushing and cleaning
filter maintenance
seasonal adjustments
occasional equipment service
That is one reason the "low maintenance" label needs context. Some pool types and finish choices are easier to live with than others, but no in-ground pool is truly maintenance-free.
What usually makes the budget climb
Pool budgets rarely jump because of one single item. They usually grow because several choices stack together.
The most common cost drivers are:
larger pool size and deeper profiles
custom shapes instead of simpler geometry
attached spas, raised walls, or water features
bigger deck areas
drainage corrections or retaining work
difficult site access
upgraded equipment, automation, heaters, or chillers
finish upgrades in tile, coping, or interior surface
A straightforward rectangular pool with practical decking is a very different project from a freeform pool with a spa, raised beam, premium tile, outdoor kitchen tie-in, and a pergola planned beside it.
How long does it take to build a pool?
PHTA says most in-ground pools take about 6 to 12 weeks from excavation to completion, and that planning and permitting can add additional weeks before the dig ever starts.
That broad timeline fits what many homeowners see in real projects. The total time depends on design complexity, permit turnaround, weather, inspection timing, access, and how much surrounding work is bundled with the pool.
A realistic expectation is:
planning and layout first
permit review before digging
structural work in stages, not one nonstop rush
finish work and startup after the shell and supporting work are ready
If the project also includes a patio extension, retaining walls, drainage work, or a covered structure, the overall schedule will usually be longer.
Bottom line
Building a pool means making the right decisions in the right order: choose the pool type, plan the layout and drainage, get permits lined up, excavate carefully, build the structure correctly, finish the surrounding space, and start the pool up the right way. The best homeowner outcome usually comes from planning the whole backyard well, not from rushing to the excavation day.
If you want help planning a pool that fits your yard, your budget, and real North Texas site conditions, schedule a consultation today.
(214) - 557 - 7809
© 2025. All rights reserved.
Call or Text
Inquire
Office Hours
Monday - Friday 8am-6pm
Saturday 8am-12pm
Transforming your backyard into a stunning oasis. We specialize in custom builds, including patios, pergolas, shops, and pools. As a turnkey solution, we manage every aspect of your project—from initial planning and permit pulling to the completed end product.
With years of experience, we pride ourselves on professionalism and reliability, delivering top-quality grading, excavating, and concrete work—done right the first time.
Your satisfaction is our priority! Get a Free Estimate today to start creating your perfect outdoor space!
Legendary Outdoor Solutions: